What changes between 8-bit and 10-bit colour?
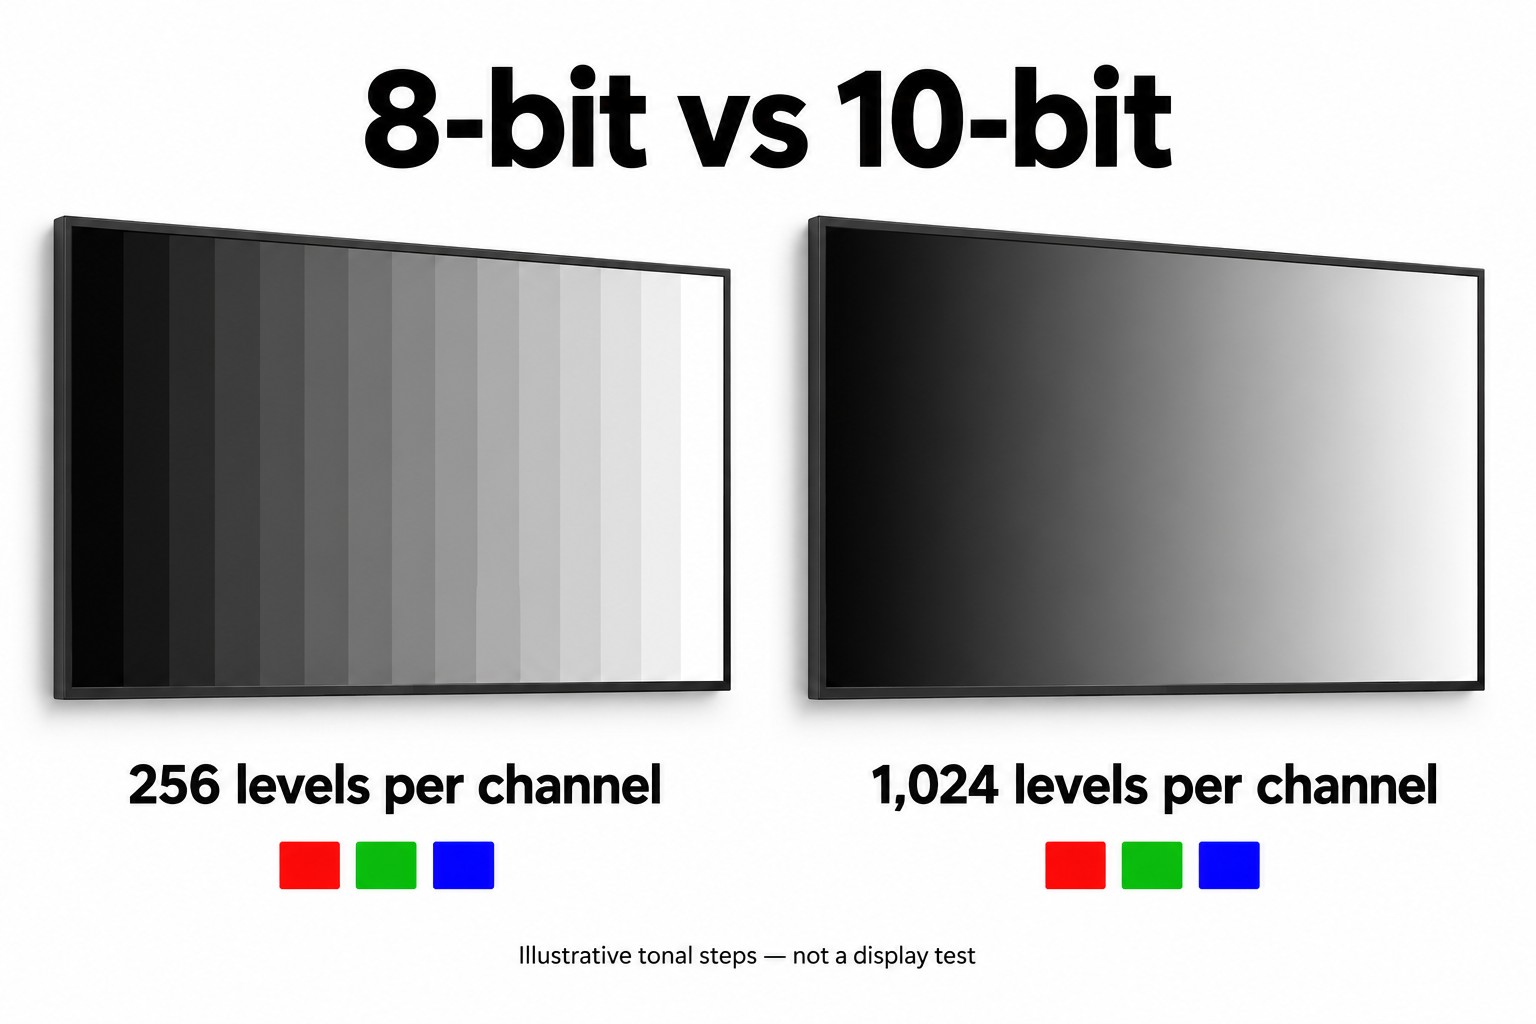
An 8-bit signal provides 256 levels per channel; a 10-bit signal provides 1,024. Extra precision can help gradients, but it does not automatically improve brightness, gamut or text readability.
- Separate input support, internal processing and panel implementation.
- Confirm the required format across files, player, connections and display.
- Compare gradients and real content under matching conditions.
- Investigate export and compression when banding appears before assuming the panel needs replacement.
For digital signage, start with the material you will actually show. A directory made from text and solid colors has different needs from a full-screen beauty advertisement with soft shadows. This guide explains how to compare color-depth claims and approve a display without buying a number that your playback system cannot use.
What changes between 8-bit and 10-bit?
In an RGB representation, three channels describe red, green and blue. Eight bits per channel provide about 16.7 million combinations; ten provide about 1.07 billion. These are theoretical code combinations. They are not measurements of a screen’s color accuracy or the number of visibly different colors a viewer can distinguish.
More levels allow smaller steps between neighboring tones. A gradual transition can therefore be represented with finer precision. However, a comparison picture on a website cannot demonstrate your hardware’s actual output depth. Our illustrations explain the concept; acceptance needs the proposed display and playback chain.
EIZO explains color-channel bit depth, internal processing and the role of a lookup table.
Color depth is separate from color gamut
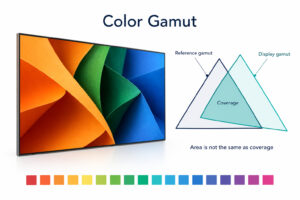
Gamut describes the range of colors a device can reproduce. Bit depth describes the available steps within a representation. Neither number alone establishes accurate color reproduction. Keep gamut, calibration and depth in separate lines of the specification so that one attractive headline cannot hide a missing detail.
For procurement questions about coverage percentages, use our commercial display color gamut guide. For this decision, concentrate on tonal precision and the path from the original content to the visible image.
Separate input support, processing and panel depth
A specification may refer to a 10-bit input, a high-precision internal lookup table or a panel’s output capability. Those statements describe different parts of the display. Ask the supplier which one a quoted figure represents. A player reporting a 10-bit connection does not, by itself, identify the panel construction.
Request a short, written configuration description for the proposed unit. It should identify supported input formats, relevant image settings and the panel’s native depth or use of frame rate control. Keep this description with the approved sample rather than relying on a generic brochure covering several configurations.
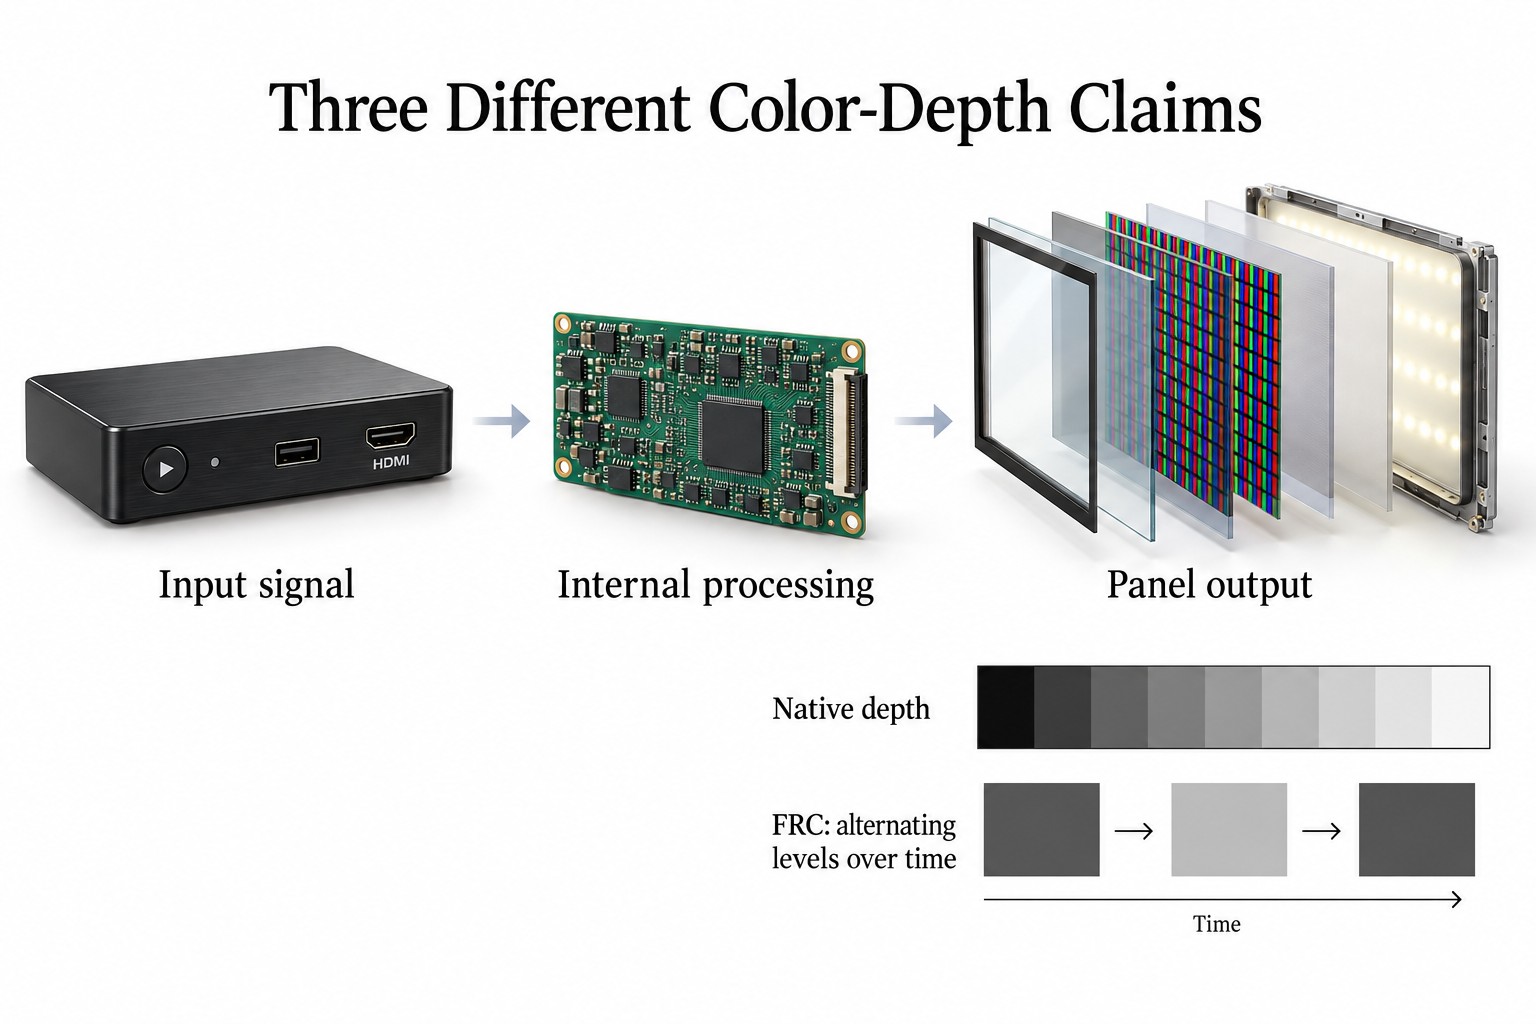
What does 8-bit plus FRC mean?
Frame rate control, or FRC, varies pixel output over time to create the appearance of intermediate shades. It is a different implementation from a native 10-bit panel. The words “1.07 billion colors” alone do not tell you which approach a product uses.
Do not accept or reject a signage display on that distinction alone. Ask for the implementation, then assess gradients and normal content on the finished unit. BenQ describes the distinction between native depth and FRC; that explanation does not establish the configuration of a YJCEN product.
When does higher depth matter for signage?
Make a small test playlist before comparing samples. Include the exact assets used in the project: brand backgrounds, product photographs, short videos and any slowly changing color washes. Inspect the areas where a transition should be smooth. Watch for visible bands, abrupt steps or unexpected changes in shadow detail.
For menu boards and directories, also inspect ordinary content at the planned viewing distance. Text size, reflections and layout may be more noticeable than a subtle tonal difference. If customers cannot read a price or destination, improving color depth will not solve that design problem.
For a retail campaign dominated by gradients and carefully prepared photography, give tonal reproduction more attention. Compare both the original asset and its final exported version. A problem already visible in the exported file should go back to the content team before it becomes a display replacement request.
Do not confuse 10-bit with HDR
A 10-bit label is not a complete high dynamic range specification. Keep the required content format, display processing, brightness behavior and viewing conditions explicit. If the project uses standard dynamic range content, demonstrate that material in its intended mode instead of selecting an unrelated showroom preset.
Check the whole playback path
Record the file format, player, software version, output setting, connection equipment and display input. Ask the integrator to confirm the required combination of resolution, refresh rate, color format and depth. An individually supported feature may not be available with every other setting selected.
Intermediate equipment deserves the same check. An adapter, extender or distribution device adds another format constraint. Test with the equipment that will be installed, not only a short cable between a demonstration source and the screen. Our chroma subsampling guide explains a separate signal setting that can affect fine colored text.
A higher-depth output cannot recover detail that was discarded from an original image. It also cannot prove that the playback application preserves every stage as intended. Ask for an end-to-end demonstration and retain the test files so that future replacement equipment can be checked under the same conditions.
A practical sample comparison
- Agree on the final playlist and retain an unchanged reference copy.
- Use the proposed player, input and signal settings for each sample.
- Match the intended operating mode and compare under the site’s lighting.
- Inspect gradients, photographs and normal text from the planned viewing position.
- Record the configuration and describe any visible defect precisely.
Change one variable at a time when investigating a problem. Compare a local reference image with the delivered video. Then compare direct connection with the installed path. This sequence helps separate content preparation, playback and display behavior without assuming that every visible band is caused by the LCD.
Photographs can document where an issue occurs, but camera exposure and processing may change its appearance. Keep a written observation alongside the image. If a numerical color measurement is required, agree on the instrument, test pattern, settings and acceptance limits before evaluating the sample.
Build a test playlist that can reveal the difference
A useful playlist separates a controlled test from a normal advertisement. Start with a smooth grayscale ramp and a small set of color gradients prepared in the intended source format. Follow them with representative photography and the actual campaign export. Label the files clearly so the operator can identify which stage is on screen.
A grayscale ramp makes abrupt tonal steps easier to locate without the distraction of a busy photograph. Color gradients add another check because a problem may be more visible in one transition than another. These patterns support an observation; their appearance alone cannot certify a panel as native 10-bit or identify its internal processing.
Keep the original files available on the test player. Avoid judging a gradient copied from a messaging app or a screenshot embedded in a presentation. That copy introduces another preparation step. If the team cannot identify how the test file was made and delivered, it becomes difficult to connect the result to a specific display requirement.
Run the reference and campaign files through the intended signage software as well as the simplest supported playback method. A difference between those two routes is worth investigating before changing the screen. Record the application and export settings, then repeat the comparison with an unchanged file to see whether the result is repeatable.
Use the audience position as the acceptance position
Inspect a test pattern closely when looking for the location of a defect. Then return to the distance and angle from which customers will see the display. Record both observations separately. A barely visible step found during close inspection does not have the same practical significance as an obvious band across a retail advertisement.
Use consistent lighting and the approved picture mode throughout the comparison. Ask the operator to record any automatic picture adjustments that remain active. If a setting changes between samples, a difference in appearance may not come from bit depth. The purpose is a repeatable purchasing decision rather than a contest between unrelated demonstration presets.
Troubleshoot banding before replacing the display
The exported advertisement already contains the bands
First ask the content team to compare the working asset with the delivered export. If the same boundary appears in the same place in both playback tests, investigate preparation and compression. Request a revised export and repeat the comparison. Selecting a higher-depth panel cannot reconstruct tonal information that the delivered file no longer contains.
Describe the issue with a location and a condition: for example, a visible step in the dark background when a particular campaign frame is displayed. This is an illustrative description, not a product test result. It gives the designer a reproducible problem and is more actionable than asking for the image to look “more colorful.”
The issue appears only through the installed equipment
Compare the installed signal route with the approved direct connection. Retain the same player, asset and display mode while removing intermediate equipment from the comparison. If the direct route looks different, return each adapter or distribution stage individually. Ask for the actual output format after each change instead of assuming that the original setting stayed selected.
If an extender or distribution unit is involved, save its model and operating settings with the result. An unresolved difference may need the integrator’s support. Do not approve a workaround that changes resolution, text quality or another project requirement without recording that tradeoff. Solving one symptom should not silently change the specification being purchased.
The result changes with the picture mode
Document the picture settings that produce the preferred result and check normal campaign content again. A setting that makes one test ramp look smoother may affect another part of the image. Compare shadow detail, ordinary photographs and brand artwork before approving the mode, and retain the approved values for future service visits.
When a problem remains, send the supplier the unchanged source file, the settings and a written observation. A phone photograph can supplement that record, but should not replace it. Avoid making a panel-depth diagnosis from the photograph alone; the camera and the device used to view the photograph introduce their own image processing.
Two example briefs with different priorities
A restaurant menu made mainly from text
Consider a menu layout with prices, solid background colors and a few product photographs. The approval playlist should include the smallest price text, the normal menu layout and a representative promotional image. Evaluate legibility, the intended colors and any noticeable gradients together rather than demanding native 10-bit as the only acceptance condition.
In this example, a display should not pass merely because its brochure quotes a large number of colors. The menu must remain clear in the installed position, and the player must reliably reproduce the approved assets. Record any color-depth requirement only after connecting it to a visible need or a contractual content specification.
A retail campaign with soft backgrounds
Now consider an advertisement dominated by a dark color wash, skin tones or slowly fading backgrounds. Include the final video export and the source artwork in the sample review. Inspect the quiet areas of the picture where tonal steps would be most distracting. A busy demonstration reel may conceal the exact problem this project needs to avoid.
Ask the content producer and integrator to agree on a delivery format before approving hardware. If the expected benefit depends on a higher-depth workflow, confirm that the source assets and player can support it. These examples describe planning methods; they do not claim that a particular YJCEN model has passed either application test.
Questions buyers often ask about color depth
Does 10-bit make small text sharper?
Bit depth describes tonal levels, so it is not a substitute for adequate resolution, suitable font size or correct signal formatting. If colored text looks blurred, review scaling and chroma settings as separate checks. Use the actual menu or directory as the test asset instead of relying on a smooth gradient to approve text quality.
Can I confirm native panel depth from the player menu?
The player’s menu can document its selected output setting, but that is a claim about the source signal. Ask for the panel implementation in the offered display configuration as a separate item. Keep both records together so maintenance staff do not later mistake a connection setting for a statement about the LCD hardware.
Is native 10-bit always the best purchase?
Choose against the application’s requirements and a repeatable sample evaluation. Native depth is one characteristic among several. The content, viewing conditions, operating mode and service requirements still matter. A price comparison becomes more useful when every candidate is assessed with the same files and the same agreed acceptance conditions.
What should I retain after sample approval?
Keep the approved files, equipment identities, software versions, picture settings and written observations in one project record. Include any agreed exceptions and who accepted them. When a replacement player or screen arrives, use that record to repeat the relevant checks instead of relying on a remembered impression of the original demonstration.
What to include in the purchase brief
Specify the content type and required signal format first. Then ask for the panel implementation, approved operating mode and evidence from the sample evaluation. Avoid requiring “10-bit” without saying whether that means accepted input, native panel depth or the complete playback requirement.
Browse indoor commercial digital signage for the product format, then send YJCEN your content and playback requirements. Confirm color-depth support for the offered configuration before ordering; this guide does not assign a native panel depth to the entire product range.