Choosing a self-service kiosk should begin with the task customers need to complete. Screen size, mounting, payment hardware and software matter, but they should support a defined customer journey rather than determine it. A kiosk that looks impressive can still create friction if the interface is unclear, the required systems do not connect or staff cannot resolve an error.
This guide covers nine practical checks for comparing kiosk configurations. It applies to ordering, check-in, product lookup, ticketing, wayfinding and other guided self-service tasks. The final specification should always reflect the operating environment, software platform, local requirements and service process for the project.
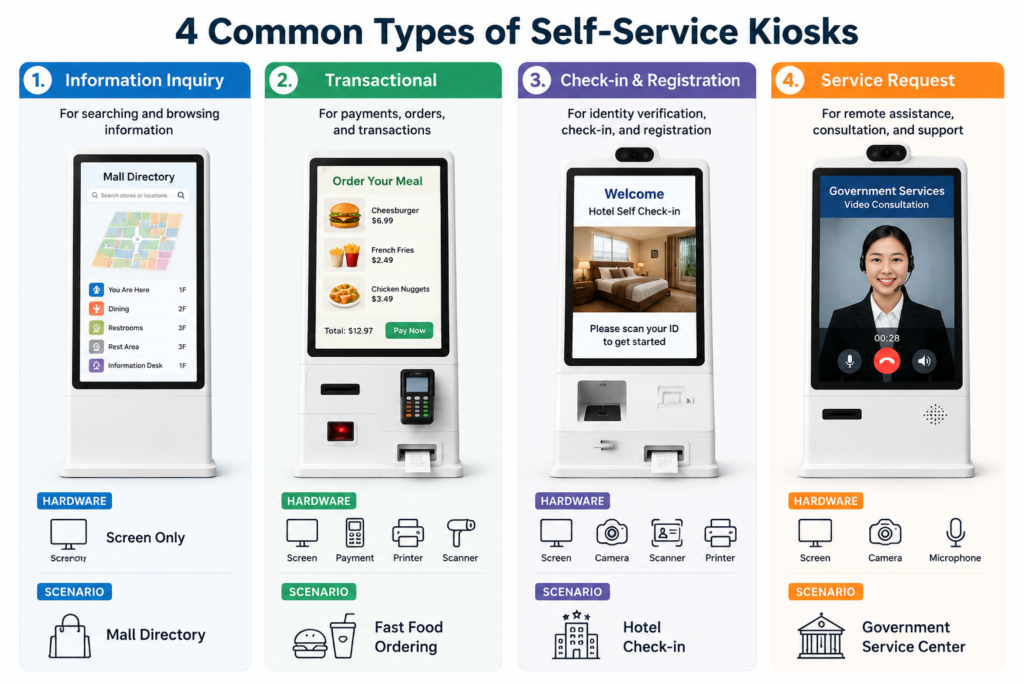
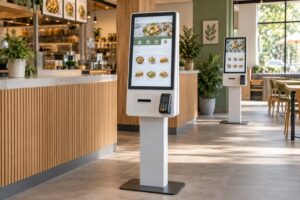
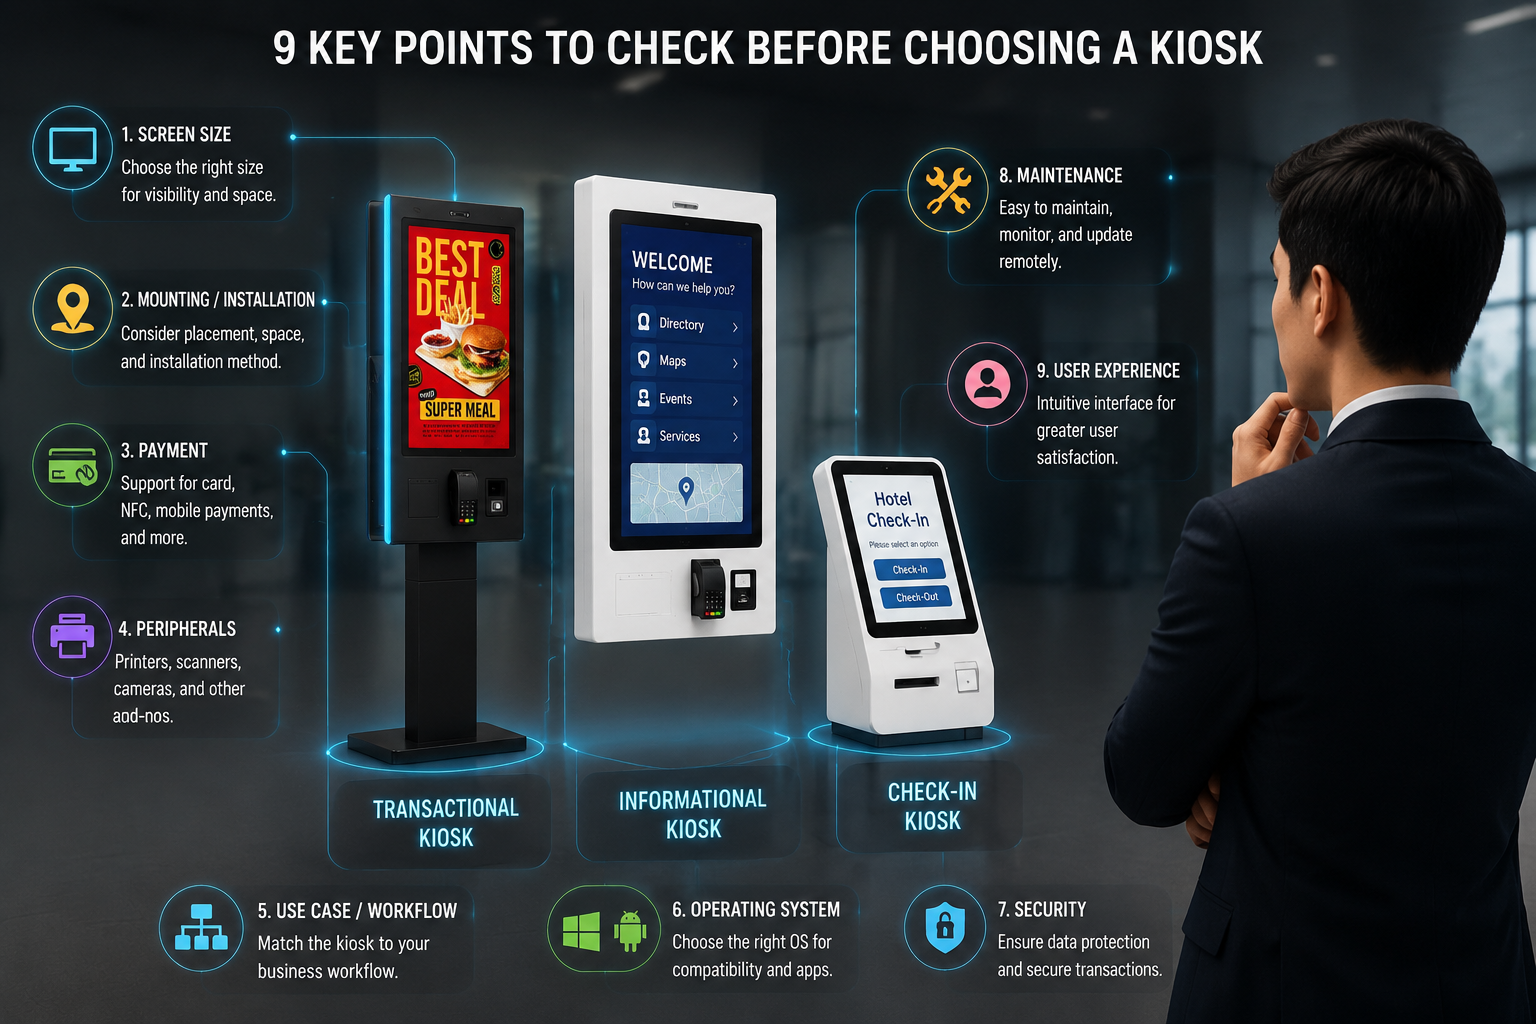
Self-service kiosks can support different customer tasks. The required hardware depends on the workflow and should be confirmed before production.
What should you confirm before buying a self-service kiosk?
Define the customer task first, then select hardware and software that can complete that workflow at the intended site.
- Confirm the screen, touch method, mounting and available user space.
- List payment, printing, scanning and other peripherals individually.
- Check operating-system support, software licensing and how transactions reach existing systems.
- Review accessibility, security, staff assistance, maintenance and lifecycle support before approving the configuration.
1. Define the Customer Task and Workflow
Start by writing one sentence that explains what the customer should accomplish. Examples include placing an order, finding a product, checking in, collecting a ticket or requesting assistance. A broad objective such as “improve service” is not specific enough to guide a hardware decision.
Map the complete sequence from arrival to confirmation:
- How does the customer notice that self-service is available?
- What information or choices appear first?
- What information must the customer enter?
- Does the task require payment, identification or document scanning?
- Which system receives the completed transaction?
- How is completion confirmed?
- What happens when the customer cancels or encounters an error?
- How can the customer request staff assistance?
This workflow separates essential components from optional features. A wayfinding kiosk may only need a display, touch input and a content source. An ordering kiosk may also require payment, receipt printing and an order-system connection. A check-in workflow may need identity or booking verification. These configurations should not be treated as interchangeable.
Document the normal path and the exception paths. The project team should know what the screen displays when a network connection fails, a printer runs out of paper, an item becomes unavailable or a transaction cannot be completed. Error handling is part of the customer journey, not a task to postpone until installation.
2. Choose Screen Size and Touch Requirements
Screen selection should follow the content and the physical interaction. Consider how much information appears on each step, whether customers need to compare products, how far they stand from the display and whether they will enter text or make repeated selections.
A larger screen provides more visual space, but it does not automatically create a clearer interface. Large menus can still be difficult to use when text is small, buttons are crowded or important actions sit outside the customer's comfortable reach. A smaller display may be suitable for a short check-in flow, while a product catalogue or configurable menu may need more room.
Check these display requirements with the supplier:
- Active screen dimensions and orientation
- Native resolution and supported content format
- Expected viewing distance and installation height
- Ambient light at the installation point
- Touch technology and supported touch points
- Touch operation with the intended user environment
- Display brightness and any protective cover
- Cleaning method and compatible cleaning materials
Brightness must be selected for the actual location. An indoor lobby, a bright storefront area and a covered outdoor position have different conditions. Do not specify brightness from a generic number alone. Evaluate ambient light, reflections, screen direction and the type of content that will be shown.
The interface should be tested on the proposed screen size before the enclosure is finalized. A working prototype can reveal text, button and reach problems that are difficult to identify from a drawing.
3. Select the Mounting Method and Site Layout
The mounting method affects visibility, customer flow, cable routing, maintenance access and physical stability. Confirm where the kiosk will stand or attach before approving its enclosure and screen orientation.
Floor-standing kiosks can create a clearly identifiable service point and allow flexible positioning within a planned area. The project still needs a stable installation, suitable power and data routes, and enough space for customers to approach without blocking a queue or walkway.
Wall-mounted kiosks preserve floor area and may suit corridors, entrances or service points with limited space. The wall structure, mounting hardware, installation height and access to internal components must be checked before installation.
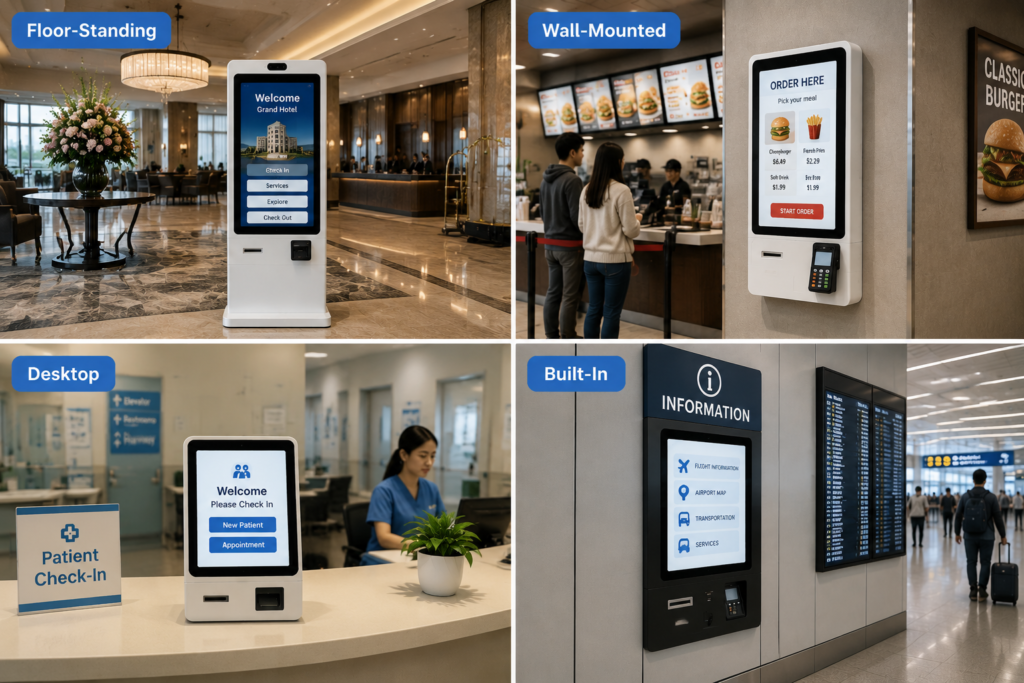
Installation planning should account for visibility, approach space, cable routing and technician access. Available mounting methods depend on the selected kiosk configuration.
Review the proposed location during normal operating hours. Observe queues, doors, furniture, direct light, cleaning activity and staff movement. Mark the screen position and ask representative users to approach it. This simple check can identify congestion and reach problems before hardware arrives.
Installation drawings should show the kiosk footprint or wall position, power and network entry points, fixing method, service-door clearance and any nearby obstacle. Local building, electrical and accessibility requirements should be reviewed by the responsible project professionals.
4. Confirm Payment Requirements
Payment should only be included when it is part of the defined transaction. The payment method, processor, terminal, merchant account, software and receipt process must work together. A kiosk enclosure cannot solve an incompatibility between the payment provider and the application.
Ask the payment and software teams to confirm:
- Accepted payment methods
- Approved terminal models and mounting requirements
- Connection between the terminal and the kiosk application
- Transaction confirmation and cancellation behaviour
- Refund or reversal responsibilities
- Network requirements
- Receipt requirements
- Security updates and service ownership
- Country- or market-specific obligations
QR-code payment, NFC contactless payment and card terminals are different implementation choices. Their availability depends on the selected hardware, software, provider and destination market. Do not assume that a payment logo on a mock-up means the complete transaction path has been integrated and tested.
The user interface should clearly separate order confirmation from payment confirmation. If a payment fails, the customer needs an understandable message and a next step. Staff also need a defined process for checking whether a transaction was submitted.
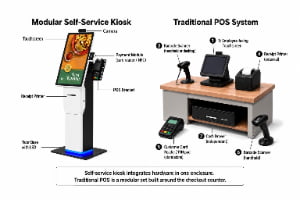
Understand kiosk and POS integration responsibilities.
5. Specify Printing, Scanning and Other Peripherals
Peripherals should be listed individually in the requirements document. A generic request for a “fully equipped kiosk” can lead to unnecessary components or missing connections.
Common project options may include:
- Thermal receipt printer
- QR-code or barcode reader
- NFC or payment terminal
- Identification or document scanner
- Camera
- Speaker or microphone
- Signature input
- Ticket or label printer
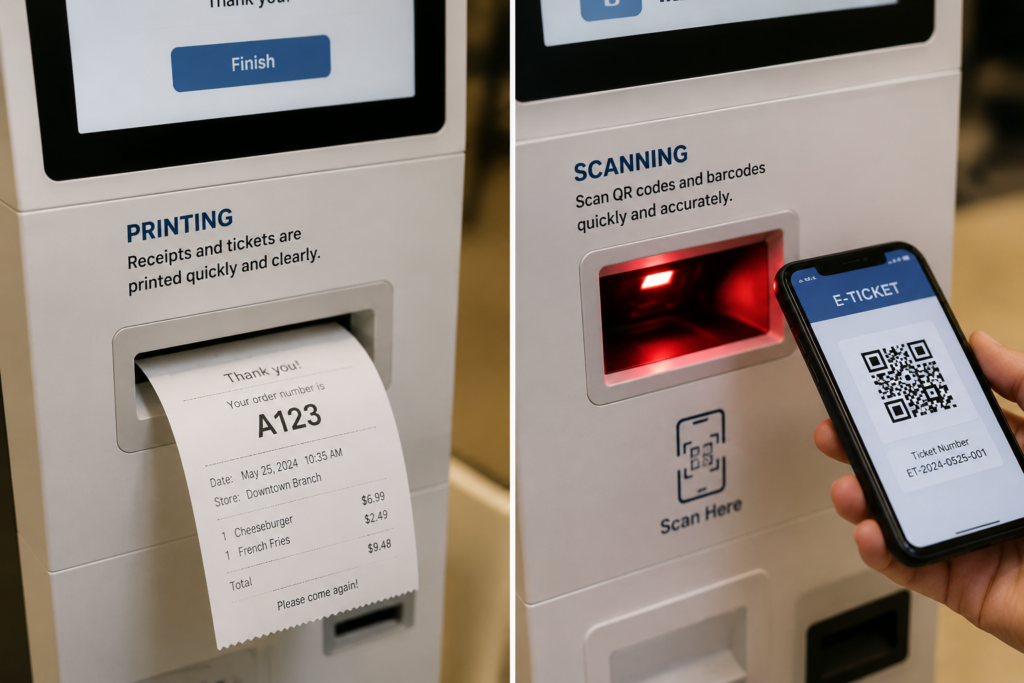
Printing and scanning are configuration-dependent functions. Confirm the media format, device interface and software workflow for each required peripheral.
For a printer, confirm paper format, roll access, status reporting and the procedure for replacing consumables. For a scanner, test the actual barcode, ticket, identity document or mobile-screen code that customers will present. A scanner that works with one sample may not support every format used by the project.
Peripheral placement also affects usability. Customers should be able to identify the correct slot or reader without searching. Labels, lighting and on-screen instructions should use the same terminology. The software must detect device errors and provide an appropriate response when a peripheral is unavailable.
Check software and peripheral requirements before buying.
6. Match the Operating System and Software
The operating system should be chosen with the application provider and IT team. The key questions are whether the required software runs reliably, whether drivers are available for the selected peripherals and how the system will receive security and application updates.
YJCEN lists Windows and Android versions for its self-service kiosk product. The appropriate option depends on the application and integration requirements. An operating-system name by itself does not confirm compatibility with a payment terminal, printer, scanner or existing business system.
Review these software points before ordering:
- Supported operating-system version
- Application installation and licensing method
- Touchscreen and peripheral drivers
- Kiosk-mode behaviour and access restrictions
- Startup and recovery behaviour
- Content or menu update process
- Remote management requirements
- Update ownership and support period
- Log collection and diagnostic access
Ask for a test build of the application on the proposed hardware when possible. Test startup, normal use, error recovery and restart behaviour. If the kiosk uses web content, also test browser compatibility, session handling and the response to an interrupted connection.
7. Plan Integration and Data Flow
A self-service interface is only one part of the system. Orders, bookings, tickets, product information or customer inputs often need to move to another platform. Integration requirements should therefore be agreed before the hardware specification is frozen.
Create a simple data-flow diagram that identifies:
- Where product, menu or service information originates
- How the kiosk receives that information
- Which system receives a completed transaction
- How prices, availability or booking status are synchronized
- How payment status is returned
- Where logs and error messages are stored
- Which team owns each connection
For restaurant ordering, the workflow may involve an ordering application, payment service, point-of-sale system and kitchen process. For retail product lookup, it may involve a catalogue or inventory system. Compatibility must be confirmed by the relevant software providers. The presence of a network port or Android or Windows system does not guarantee application-level integration.
Define offline behaviour as well. Some tasks may continue with locally stored content, while transactions that require current data or authorization may need to pause. The screen should not silently accept information that cannot be delivered to the destination system.
8. Check Accessibility, Privacy and Security
Accessibility should be considered during layout, hardware and interface design. Review screen height, viewing angle, touch-target size, text readability, contrast, language, time limits and the availability of an alternative service channel. Requirements differ by location and application, so the responsible project team should verify the standards that apply.
Privacy matters when customers enter personal, booking or payment information. Position the screen to reduce unnecessary observation, display only the information required for the task and clear customer data when a session ends. Explain how customers can obtain help without exposing information to other users.
Security planning should cover both the device and the connected systems:
- Physical fixing and controlled service access
- Restricted access to operating-system functions
- Approved application installation
- Secure network configuration
- Account and credential management
- Software and security update responsibilities
- Protection and retention of logs
- Incident and device-replacement procedures
The exact controls depend on the data, payment method, network and operating environment. Ask the customer's IT, payment and compliance teams to approve the final design rather than relying on a general statement that a kiosk is “secure.”
9. Evaluate Maintenance and Lifecycle Support
Maintenance begins with enclosure design and component access. Technicians need a safe way to clean the screen, replace consumables, inspect connections and reach serviceable parts. A visually clean installation should still allow practical maintenance.
Before purchase, identify:
- Screen and enclosure cleaning procedures
- Access method for internal components
- Printer-paper and other consumable replacement
- Spare-part availability
- Remote and on-site diagnostic responsibilities
- Software update process
- Warranty coverage and exclusions
- Technical-documentation availability
- Escalation route when a device cannot be restored
The YJCEN product page lists an upgradeable system and a three-year warranty for the current self-service kiosk product. Confirm the exact configuration, warranty terms, destination and support arrangement in the project quotation and documentation.
Plan acceptance tests before shipment or installation. Tests should cover the screen, touch response, application, required peripherals, network connection, normal transaction, error handling, restart behaviour and any integration in scope. Record the approved software and hardware versions so later changes can be evaluated against a known baseline.
Self-Service Kiosk Requirements Checklist
A concise requirements document helps suppliers provide comparable proposals. Include the following information:
- Primary customer task and complete workflow
- Installation country and indoor or outdoor environment
- Floor-standing or wall-mounted installation
- Available installation space and screen orientation
- Expected content and interface design
- Operating hours and anticipated usage pattern
- Required operating system and application
- Payment methods, if required
- Printer, scanner, camera or other peripherals
- Network and remote-management requirements
- Systems that require integration
- Accessibility and privacy requirements
- Language and content-update process
- Cleaning, maintenance and support responsibilities
- Acceptance-test criteria
Mark every item as required, optional or not needed. This prevents optional functions from being mistaken for standard equipment and helps the supplier identify unresolved technical dependencies.
Plan the hardware budget for a self-service kiosk.
Questions to Ask a Kiosk Supplier
Use the same questions when comparing proposals:
- Which functions are included in the quoted configuration?
- Which functions require separate hardware, software or licensing?
- Which screen sizes and mounting methods are available?
- Which operating-system versions are supported?
- Have the proposed peripherals been tested with the application?
- Who is responsible for payment and third-party integration?
- How are software updates and remote support handled?
- What documentation is supplied before installation?
- What does the warranty cover for this destination and configuration?
- Which acceptance tests can be completed before delivery?
Comparable answers are more useful than a long feature list. If a response depends on another vendor, record that dependency and obtain confirmation from the responsible party.
Frequently Asked Questions
What is the first step when choosing a self-service kiosk?
Define the customer task and map the full workflow, including confirmation, errors and staff assistance. Hardware should be selected after the required steps and system connections are understood.
Does every self-service kiosk include payment and printing?
No. Payment terminals, QR-code readers, NFC modules and printers depend on the selected hardware, software and project configuration. Each required component should appear in the quotation and acceptance test.
Should I choose Windows or Android?
Choose the operating system that supports the application, peripherals, security process and IT-management requirements. Confirm compatibility with the software and device providers before ordering.
Is a larger touchscreen always better?
No. The screen should suit the content, viewing distance, interaction length, installation space and user reach. Test the interface at the proposed size instead of selecting by size alone.
What information should I give the manufacturer?
Provide the workflow, installation environment, mounting method, screen orientation, software, peripherals, integration requirements, operating hours, destination and support expectations. Drawings and interface examples help reduce ambiguity.
Choosing a YJCEN Self-Service Kiosk
The most suitable kiosk is the one that supports the required customer journey and can be installed, integrated and maintained in the intended location. Define the workflow first, identify required functions and confirm every dependency with the relevant hardware, software, payment and IT teams.
YJCEN offers self-service kiosk configurations with multiple sizes, Windows or Android options, touchscreen operation, Wi-Fi and USB support. Wall-mounted and floor-standing installations are available. Review the YJCEN Self-service Kiosk product page and provide the project requirements so the screen, mounting, peripherals and system configuration can be checked before quotation.