Quick Guide: Specify the Complete Ordering Workflow
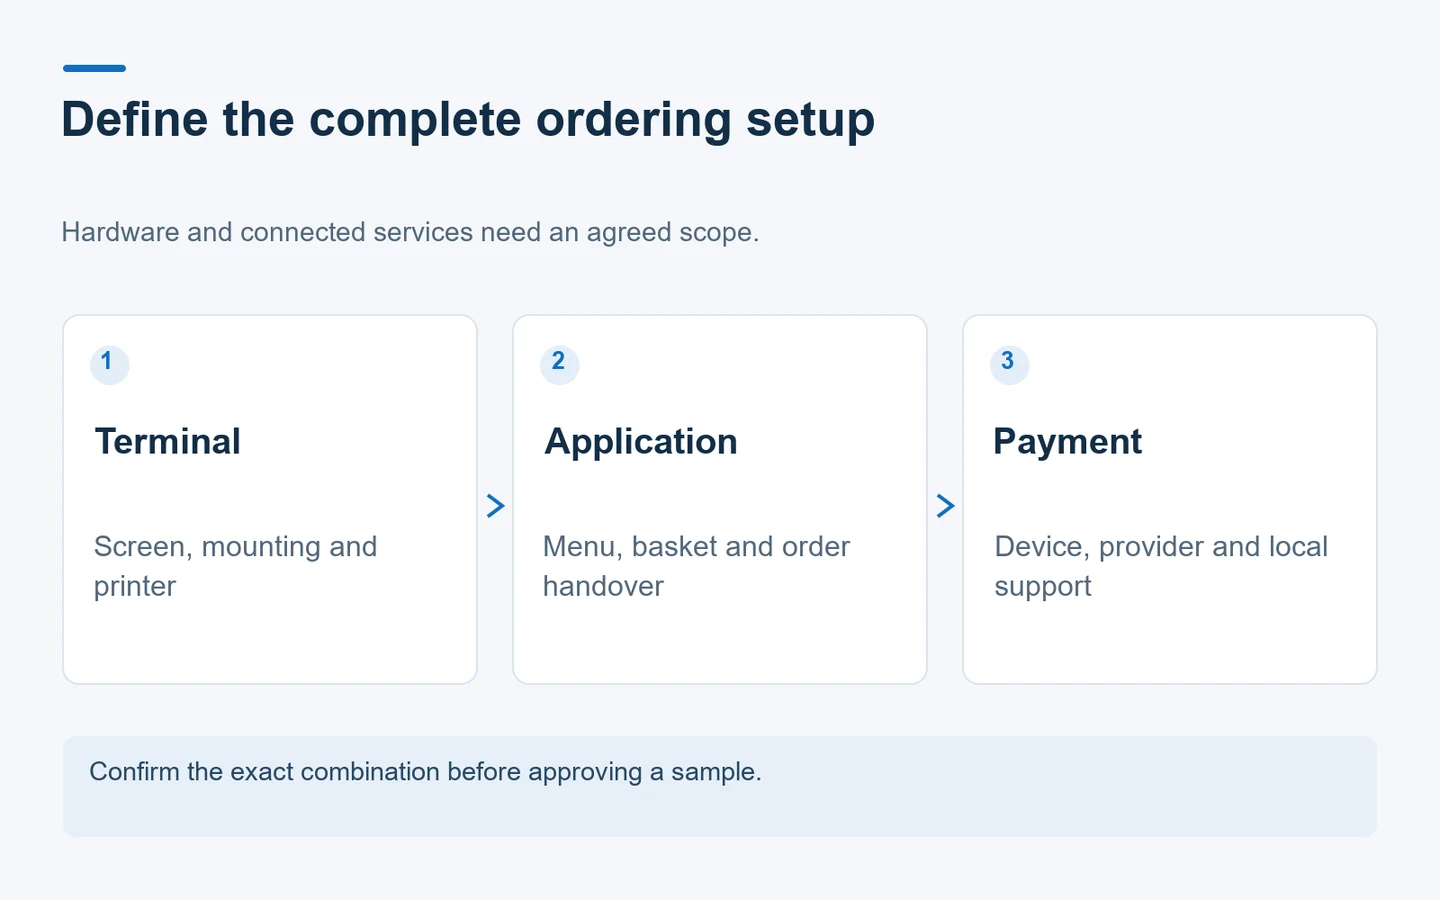
A restaurant kiosk purchase needs an agreed hardware configuration and a tested connection to the ordering workflow. The touchscreen alone is not the complete system.
- Name the application: Confirm its operating system, version and supported hardware.
- Confirm payment locally: Match the terminal, provider and application to the installation market.
- Check the receipt: Test paper handling, order numbers and recovery from an empty roll.
- Approve a working sample: Test the customer journey and staff recovery steps before a larger order.
A self-ordering kiosk should be specified around the restaurant’s actual ordering process. Customers need to select an item, review their choices, complete the required payment and receive a clear next step. Behind that simple journey are separate decisions about hardware, software, payment services and the handover to the kitchen.
This article focuses on preparing those decisions before purchasing terminal hardware. It does not estimate a universal kiosk price or assume that a particular POS system is compatible. Its purpose is to help a buyer turn a broad enquiry into a configuration that the hardware supplier and software providers can check together.
Start with the restaurant’s existing software
Write down the ordering application, POS platform and kitchen system currently in use, including their versions. Name the supplier responsible for each connection. If software has not yet been chosen, record that as an open decision rather than asking a hardware quotation to include an unspecified complete ordering service.
Ask the application supplier for its supported operating systems and device requirements. Include how it connects to touch input, printers and payment hardware. A statement that an application runs on Android or Windows is useful, but it does not confirm every version, driver, peripheral or installation arrangement.
Separate a supported integration from a proposed development project. A supported connection should have defined setup instructions and a responsible support team. A new integration needs scope, testing and a delivery plan. Neither should be inferred merely because two systems have network connections or appear in the same equipment list.
Record what happens after an order is submitted. Does it reach the POS, a kitchen display, a printer or a separate queue? Who maintains menu changes and availability? These answers affect the sample test. They also prevent the hardware supplier from being held responsible for a workflow controlled by another application.
Match the YJCEN configuration to the project
The YJCEN self-service ordering kiosk offers 21.5, 27 and 32-inch capacitive touchscreens, wall-mounted or floor-standing installation, and an integrated 80 mm thermal receipt printer. QR code and NFC payment configurations are available, with an optional HD camera when the project requires it.
These are hardware configuration points. The ordering application, payment processing, software licences and integration services are specified separately. Selecting a listed payment configuration does not make a payment service available automatically in every country. The provider and application must support the chosen terminal and market.
Use the product’s current drawing and agreed component list when comparing proposals. Identify which screen size, mounting arrangement and peripherals are included in each quotation. Ask the supplier to mark optional items separately, so a lower total is not mistaken for the same configuration with essential components omitted.
If the project needs detachable components or a different arrangement, compare the modular self-service kiosk hardware. The relevant difference is the component arrangement. Do not assume that modules from one design can be swapped into another without checking physical fit, interfaces and software support.
Choose the screen using the actual menu
A larger screen is not automatically a better ordering interface. Test a representative menu at the intended display size. Include a simple item, a meal with options, an unavailable item and the final basket. Look at the controls customers must use most often, rather than judging only the welcome screen.
Check that names, prices and selection states remain readable. Confirm that long item names and translated menus do not push important buttons out of view. A touchscreen can display detailed choices, but the application must organize them clearly. Extra screen area does not compensate for an unclear sequence of questions.
Ask someone unfamiliar with the menu to complete a sample order without coaching. Observe where they hesitate, repeat a tap or lose track of the basket. These observations help the software team refine the interface. They do not establish a guaranteed improvement in order value, waiting time or sales.
Also test staff access to the application. A public ordering screen and an administrative menu have different purposes. The software supplier should define how staff update availability or return the terminal to service. Avoid relying on an undocumented sequence that only the installer knows.
Confirm payment hardware and provider together
List the required payment methods and the installation country. Ask the payment provider to confirm the exact terminal model, supported integration and commercial setup. A contactless symbol or QR reader on the hardware does not prove that the customer’s preferred service is activated or supported.
Clarify which device collects payment credentials and which application receives the result. The kiosk needs a reliable indication of whether the transaction completed, failed or remains uncertain. Do not treat the disappearance of a payment window as evidence that the restaurant has received a confirmed payment.
Provider documentation demonstrates why this is a separate integration task. For example, Square’s Terminal API describes a provider-specific connection between an application and a payment terminal. This is an example of a defined payment interface, not a statement that Square is included with or certified for the YJCEN kiosk.
Use the payment provider’s approved test procedure for cancellations, timeouts and interrupted transactions. Assign responsibility for reviewing an uncertain result before a customer repeats payment. The exact recovery behavior belongs to the agreed payment and ordering setup and should be documented with the software team.
Specify what the receipt must contain
The thermal printer produces the content sent by the application. Prepare a sample receipt with the required order reference, purchased items and collection instructions. Confirm any local business or tax requirements with the appropriate adviser and software provider; the presence of a printer does not establish compliance by itself.
An 80 mm printer specification describes a paper-width class, not the complete printed layout. Check the selected paper roll dimensions, loading method and printable area with the supplier. Test long item names and the largest representative order. A layout that fits a short test order may wrap differently in normal use.
Place the kiosk so staff can replace paper and clear a permitted jam without moving the whole station into a customer route. Confirm which access panels or keys are needed. Keep paper storage and routine maintenance instructions close enough for staff to follow, while restricting service access as required by the installation.
Include an empty-paper test during sample approval. Check what the customer sees and how staff know the order status. A missing receipt should not leave everyone guessing whether the order reached the kitchen. The application must define an appropriate response rather than depending solely on the physical paper output.
Compare wall mounting with a floor-standing station
A wall-mounted unit can conserve floor space where a suitable supporting wall and service route are available. A floor-standing unit creates a distinct ordering station. Compare the complete occupied space, including the customer standing in front, waiting customers and staff opening the service area.
Use the selected model drawing to check dimensions and fixing requirements. Do not choose mounting hardware from the touchscreen size alone. Have the site team confirm the supporting structure, power provision and cable route. The final installation method needs to suit the actual unit and the conditions at the restaurant.
Check reach to the touchscreen, payment device and receipt outlet as a single interaction. Customers should not have to change position unpredictably between steps. Applicable accessibility requirements need a project-specific review; a large touchscreen or a low mounting position alone does not prove that the complete station is accessible.
Walk the route from entrance to ordering, waiting and collection. Keep queues away from exits and service access. Mark the proposed position temporarily before final installation so the restaurant team can identify conflicts during a realistic service period. This is a layout check, not a substitute for the site’s required professional approvals.
Define the sample acceptance sequence
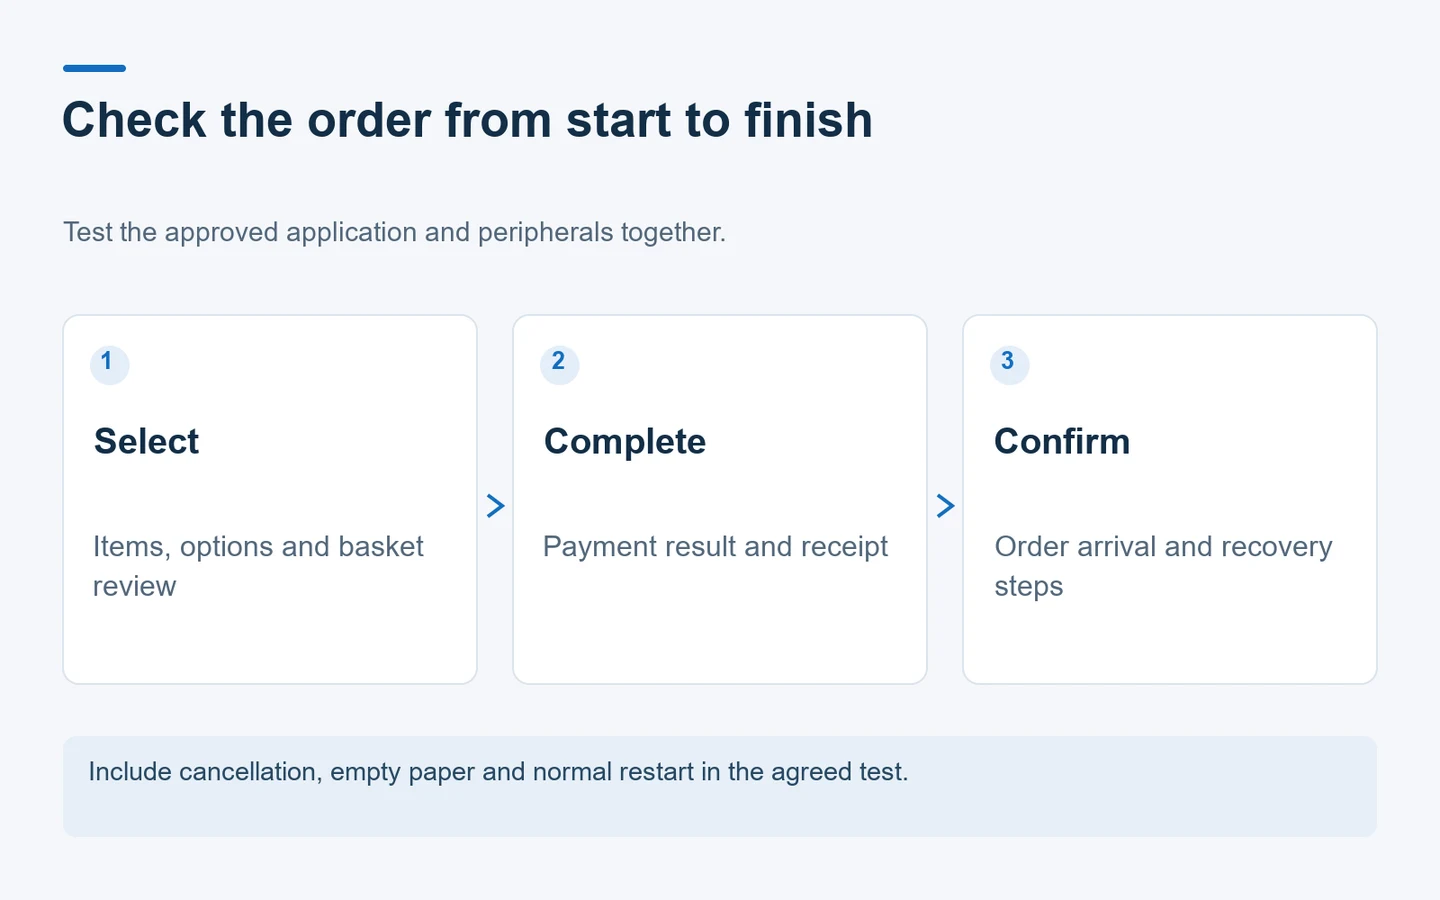
Begin with a normal order: select items, change an option, review the basket, complete the agreed payment test and confirm the order at its destination. Compare the receipt with the kitchen or POS record. Record the actual application and hardware versions used, so the approved combination can be reproduced.
Then test corrections before payment. Remove an item, return from a selection page and cancel an incomplete basket. Confirm that the next customer starts with a clean session. These are application behaviors, but the hardware sample gives the team a place to check them under the intended screen and peripheral arrangement.
Add recovery tests agreed with the suppliers: temporary loss of network, an empty paper roll, a cancelled payment and a normal restart. State the expected outcome before running each test. Otherwise, a result may be called successful simply because the screen becomes usable again while the order status remains unclear.
Keep the test list short enough to repeat after a software update, but specific enough to reveal a broken connection. Save the result, the person who checked it and any outstanding issue. A sample with open payment or order-handover faults should not be recorded as fully accepted merely because the touchscreen responds.
Make responsibilities visible in the quotation
Separate the physical terminal, mounting arrangement, printer, payment hardware, operating system and any agreed accessories. Then list software licences, payment services, integration work, installation and ongoing support as their own scope items. This makes omissions visible without presenting software costs as part of a hardware-only price.
Ask who handles each support situation. A damaged cabinet, an application crash, a declined payment and an incorrect menu price can require different teams. Give the restaurant a clear first contact and an escalation route. The useful outcome is a workable support process, not an unsupported promise that one supplier controls every part.
Agree how changes are approved after sample acceptance. Substituting a printer, operating-system version or payment terminal may require another targeted test. A component that appears equivalent in a quotation can still use different drivers or interfaces. Record the approved bill of materials and software versions with the purchase documents.
For a multi-site order, distinguish the common configuration from site-specific items. Country, power arrangements, connectivity and payment setup may differ. Use one master brief with clearly marked exceptions instead of allowing local variations to emerge only after delivery. Confirm which exceptions require a separate sample or installation check.
Send a brief that can be reviewed
A useful enquiry includes screen size, installation format, quantity, country and site photographs or drawings. Add the ordering and POS application names, versions, operating-system requirements, selected payment provider and sample receipt. Identify unresolved decisions so the proposed hardware can be reviewed honestly against the available information.
Include the intended daily workflow: opening, menu updates, paper replacement, customer assistance and closing. This helps the project team discuss access and operation, not only the front-facing appearance. Keep forecasts or commercial targets separate from verified hardware requirements; they are business assumptions rather than product specifications.
When those details are ready, send the configuration brief to YJCEN for a hardware review. The next step is to agree a sample and acceptance procedure with the relevant software and payment providers. That produces a clearer purchasing decision than selecting a terminal solely by screen size or an incomplete headline price.