What should you check before calibrating a kiosk touchscreen?
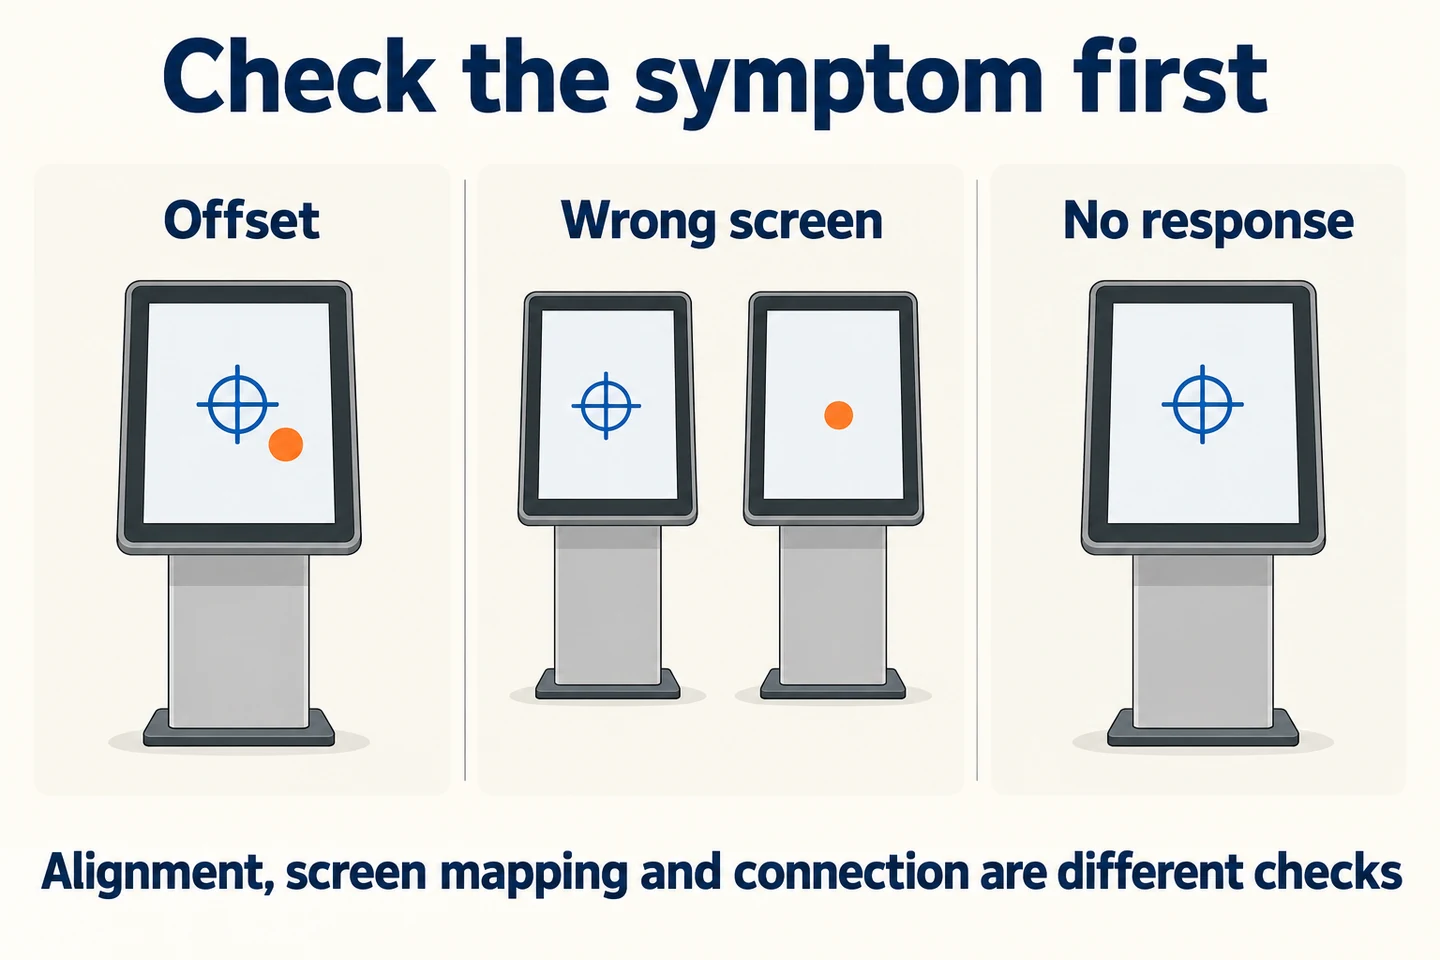
First identify whether touch is offset, assigned to the wrong display or failing only inside the application. Calibration does not solve every touch problem.
- Check the touch-data connection and controller-to-display assignment.
- Set the final resolution, orientation and desktop arrangement.
- Use only the alignment procedure supported by the controller and operating system.
- Test the centre, corners, edges and real application, then restart and repeat the checks.
This guide covers commercial information and self-service kiosks. It does not prescribe one calibration tool for every controller or operating system. Use the instructions supplied for the exact touch hardware, and keep a working keyboard or mouse available while testing.
What calibration changes
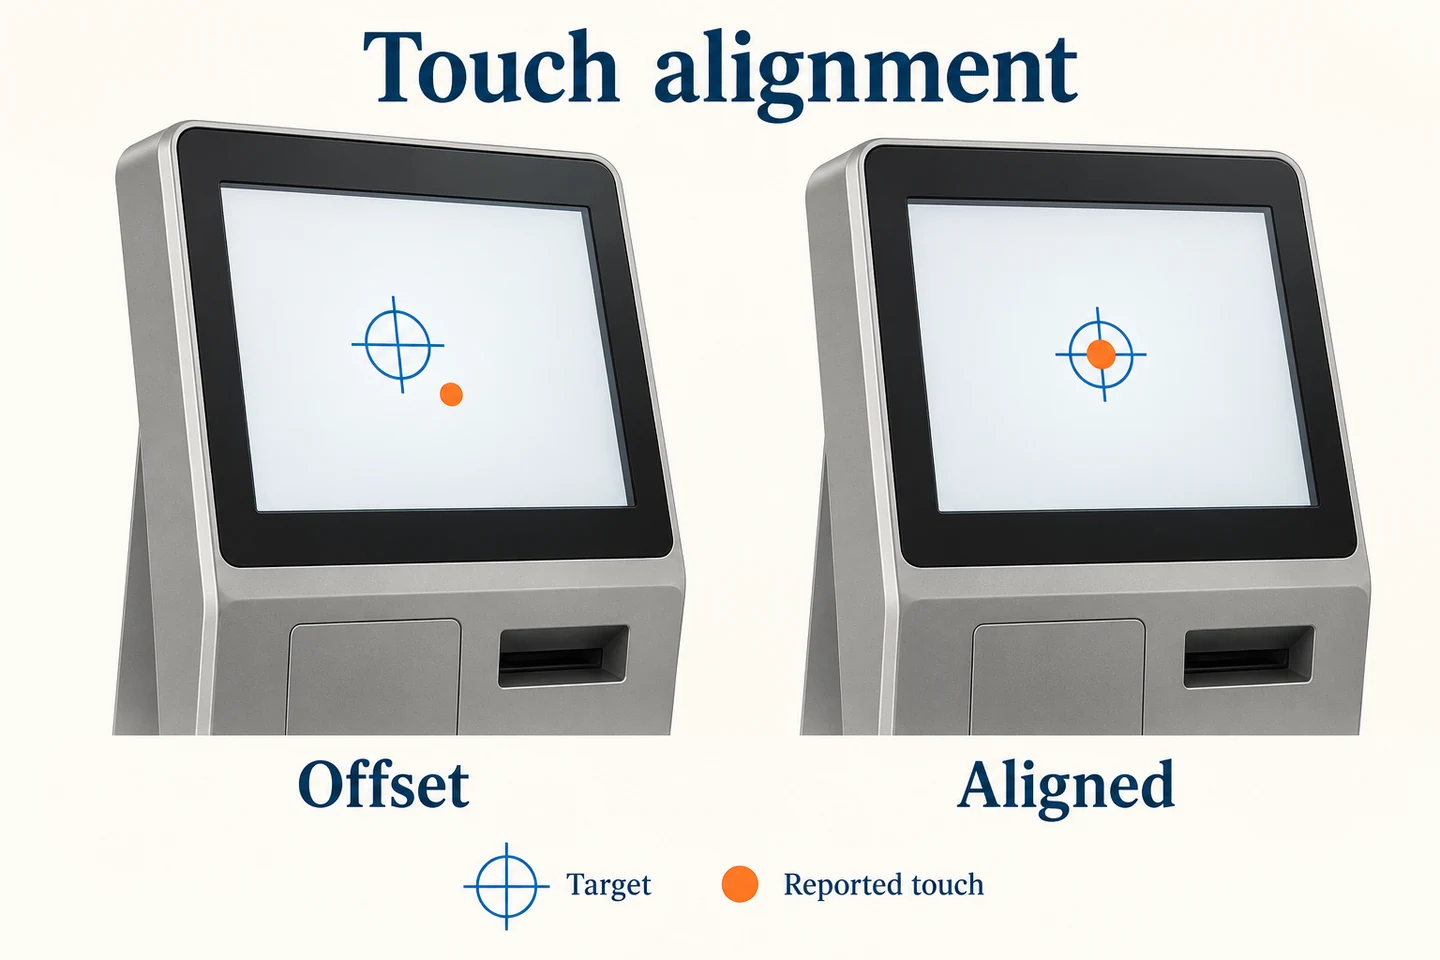
Calibration aligns the reported touch position with the displayed image. It does not sharpen the picture, repair damaged glass, or add support for gloves. Display resolution, touch detection and application button design are separate parts of the system.
Some controllers need an alignment procedure; others arrive calibrated and mainly need the correct screen assignment and orientation. Elo’s explanation of video alignment makes this distinction between its touch technologies. Treat it as a reason to check your controller documentation, not as a universal procedure for another manufacturer’s hardware.
Describe the symptom before changing anything
Open a simple test screen outside the ordering or wayfinding application. Touch several clearly separated positions. Note whether the reported point is consistently displaced, whether the error changes across the screen, and whether touching this screen controls a different display.
| Symptom | First question |
|---|---|
| Every touch lands beside the target | Are image orientation and touch alignment consistent? |
| Touches operate another screen | Is the controller assigned to the correct display? |
| Only the application responds incorrectly | Does its layout match the final display settings? |
| No touches are detected | Is the touch connection present and the controller recognized? |
| Touches appear without a finger | Is there contamination, interference or a hardware fault to investigate? |
Save the original settings before adjusting them. Record the kiosk model, controller identification, operating system and driver version. A short description such as “all points land above the target after rotation” is more useful than “the touch screen is inaccurate.”
Check the touch path as well as the video path
A video cable can deliver the image while the touch connection is missing. On a system with a separate touch interface, confirm that connection against the wiring diagram. Do not assume that every HDMI, USB-C or network connection provides both functions.
Check whether the operating system detects the intended controller. Use the supplier’s documented utility when one is required. Avoid installing a collection of unrelated touch drivers to see which one works; first establish the hardware identity and approved software combination.
If the controller is absent, alignment is not the first task. Inspect the permitted external connections and report the detection result to the supplier. Do not open a sealed kiosk or change its internal wiring simply to complete a calibration attempt.
Set the final image orientation first
Confirm landscape or portrait orientation, resolution and the intended desktop arrangement before alignment. A display rotated in the operating system must still correspond correctly to the touch coordinates. Record which edge is physically at the top.
For two-screen systems, identify each display with a distinct test image. Check which screen responds when the touch surface is pressed. Correct the assignment using the supported system or controller settings before trying to correct an offset.
Keep the final physical installation in the test. A bench setup may use different cables, an extra desktop monitor or another display arrangement. Repeat the affected checks after moving from that setup to the finished kiosk.
Run only the supported alignment procedure
If the documentation calls for calibration, follow the displayed sequence and touch each target as instructed. Keep the contact deliberate and avoid resting another hand on the active area. Confirm the result before saving it.
Elo’s alignment instructions illustrate a target-based procedure for its supported setup. The target count, utility and confirmation step can differ on other hardware. A controller that does not expose this procedure should not be forced through an unrelated tool.
If the check screen is worse after adjustment, restore the documented previous state or use the supplier’s recovery instructions. Keep both the original observation and the result of the attempted change. Repeatedly calibrating without recording the outcome can hide the actual cause.
Test the whole active area
One accurate touch in the middle is not sufficient. Check the center, positions near each corner, and controls along the edges. Keep test targets inside the usable display area. Confirm whether the reported location remains consistent across the surface.
Then use the real application. Test the smallest intended buttons, the on-screen keyboard, scrolling and the back or cancel control. Where the application uses dragging, follow a continuous path and look for interruptions. Only test multi-touch gestures if the selected system is supposed to support them.
Separate detection from usability. A button may respond accurately but still be awkward to reach or too small for its purpose. Changing the application layout can be appropriate when coordinates are correct; further calibration would not solve that design issue.
Repeat the check under the intended conditions
Use the final cover surface and approved cleaning condition. If staff or visitors will wear gloves, confirm that the exact glove and controller combination is supported, then test it. A successful bare-finger test does not demonstrate glove performance.
Do not treat moisture, dirt or an object pressing against the active edge as an alignment value to compensate for. Follow the equipment’s cleaning and inspection instructions. Persistent unwanted touches, dead areas or unstable behavior need a separate fault investigation.
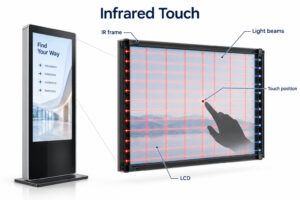
For more background on the sensing method, see our guides to projected capacitive touch integration and infrared touch screens. The technology name alone does not establish performance in every installation.
Check what survives a restart
Restart the kiosk using its normal operating procedure. Check that the controller still addresses the correct screen and that the application opens in the expected orientation. Test the same reference points used before the restart.
If the fault returns only after restart, record the sequence and the settings that changed. Check display assignment, application startup and the approved driver configuration with the supplier. Do not make daily recalibration part of the operating routine without understanding why the setting is lost.
Keep an acceptance record that another person can repeat
Write a short test sheet with the final settings, the reference positions and the expected response. Include the application version and the tested operating conditions. Describe actual results rather than claiming an accuracy value that has not been measured.
| Record | What to retain |
|---|---|
| Equipment | Kiosk, controller and computer identification; connection arrangement. |
| Configuration | Operating system, approved driver, resolution, rotation and display assignment. |
| Touch checks | Center, corners, edges and the application’s important controls. |
| Operating conditions | Cover surface and any supported glove or other requirement actually tested. |
| Recovery | Results after the normal restart and application launch. |
When reporting a problem, include a brief video that shows the finger and the screen response together, if your site permits recording. Remove customer information from the test. Identify whether the same error occurs outside the application.
Check a reported error with a repeatable test
Use the same small set of target positions before and after an adjustment. Include the centre, the corners and the areas used by important application controls. Record which target was touched and where the system responded. A consistent test makes two configurations easier to compare than an informal swipe across the screen.
Keep the display settings fixed during this comparison. If rotation, resolution or desktop arrangement changes at the same time, the second result no longer isolates the alignment adjustment. Write down each change and return to the agreed final configuration before testing the actual kiosk application.
Test with the input method the installation requires. A bare-finger check does not establish glove support, and a successful test with one glove does not establish support for every material. Where gloves are part of the requirement, identify the sample used and ask the supplier to confirm the intended combination.
Distinguish an application layout problem from alignment
If the test targets respond correctly but a checkout button does not, record the application page, window size and exact control involved. Check whether the visible button and its active area correspond. Send that evidence to the application provider instead of repeatedly adjusting a controller that already passes its own test.
Include the first action after the application starts, a return from an idle screen and a normal restart. These checks can expose a layout or display-assignment change that is absent during a short demonstration. They are observations to record, not proof that every possible fault has been eliminated.
Keep a clear distinction between a resolved symptom and an approved installation. A technician may remove an offset in a test utility while the final software still needs review. Record both results and identify who is responsible for the remaining check before the kiosk is handed over.
What to confirm when ordering a kiosk
Ask which touch controller and operating system are included, how display assignment is performed, and whether a calibration procedure is required. Request the relevant instructions before sample acceptance. Include intended orientation and any glove requirement in the enquiry.
For a YJCEN interactive kiosk or self-ordering kiosk, confirm the final configuration with the project team. Send your application, screen orientation and touch requirements so that the sample checks reflect how the kiosk will actually be used.